Posts

Showing posts from 2017

Slaesforce Triggers

Image
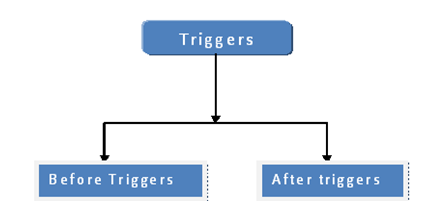
What is Apex Triggers ? A Trigger is Apex code that executes before or after the following types of operations: insert update delete merge upsert undelete Types of Apex Triggers Before Triggers: Before triggers can be used to update or validate record values before they are saved to the database. After Triggers: After triggers can be used to access field values that are set by the database (such as a record's Id or last Updated field), and to affect changes in other records, such as logging into an audit table or firing asynchronous events with a queue. Example : before insert, after insert, before update, after update, before delete, after delete Syntax of Trigger Important Points- Bulkify your Code : Use Looping through Trigger’s collections variables instead of process through particular indexing. All triggers are bulk triggers by default, and can process multiple records at a time. Bulk triggers can handle both single record updates and bulk

Batch Apex

What is batch class? Batch class is just similar to Apex class except that batch class includes the Salesforce provide interface “Database.Batchable”. Why we use batch class? When we want to perform DML operations for bulk records or hit the web service then batch class comes in the picture. Database.Batchable interface contains three method. Start Execute Finish Start Method       global Database.QueryLocater start(Database.BatchableContext bc) {} Use this method to get the records from database or object to be passed to “Execute” method. This method returns Database.QueryLocater object that contains the records. Query fired in the start method will return maximum 5,000,0000 records in a transaction. Execute Method            global void execute(Database.BatchableContext bc , List  scope) {} This method is used for do all the processing for data. This method takes two arguments. A reference of Database.BatchableContext object. A list of sObjec

XML file in Apex Class

public with sharing class domXmlParsing { //method to parse xml file public static string walkThrough(){ //XML string to parse String response = '<S:Envelope xmlns:S="http://schemas.xmlsoap.org/soap/envelope/">' + '<S:Body>' + '<wss:createPendingTicketResponse xmlns:wss="http://www.boomi.com/connector/wss">' + '<wss:createPaymentTransctionLogResponse/>' + '<PendingTicket xmlns:pay="http://www.boomi.com/v1b/Payment">' + '<pay:Response>' + '<pay:R10TillID>test001</pay:R10TillID>' + '<pay:R10SequenceNumber>test002</pay:R10SequenceNumber>' + '<pay:SFTnxId>test003</pay:SFTnxId>' + '<pay:R10TnxID>' + 'TESTME' + '</pay:R

Custom button on Opportunity to clone opportunity with its related List (object)

Create a new Detail Page Button on the Opportunity object. Set Behavior to Execute JavaScript and Content Source to OnClick JavaScript Paste the Below snippet of code in the window {!REQUIRESCRIPT("/soap/ajax/39.0/connection.js")}  {!REQUIRESCRIPT("/soap/ajax/39.0/apex.js")}  var retStr;  retStr = sforce.apex.execute(" CloneOpportunitywithRelatedObject "," cloneOpportunity ",  {oppId:"{!Opportunity.Id}"});  location.replace('/' + retStr);   Create a new Apex class and paste the below snippet of code global class  CloneOpportunitywithRelatedObject  {     webservice static Id  cloneOpportunity (Id oppId) //  pass parameters     {         List < Related_Object__C > relatedList = new List < Related_Object__C > ();   // query all the fields you need to clone          Opportunity opp = [SELECT ID, CloseDate, StageName, Type, Name FROM Opportunity                                        WHERE Id =: oppId

Trigger to update latest due date of task on Opportunity

Create a new custom field on opportunity called  Update_Due_Date_of_Task__c (Date/Time) and create the below trigger on task object.  Output : If there are multiple tasks on opportunity the above custom field will be updated by due date which is greater from all task's due date. Trigger updateLastActvtyUpdateOnOpty on Task(after update, after insert) {     Datetime lastUpdatedDate;     Set < String > whatIDs = new Set < String > ();     for (Task tskObj: Trigger.new) {         if (tskObj.whatId != null && tskObj.ActivityDate != null) {             whatIDs.add(tskObj.whatId);         }     }     If(whatIDs.size() > 0) {         Task taskObj = [select Id, ActivityDate, WhatId from Task where WhatId =: whatIDs                                  order by ActivityDate DESC LIMIT 1];          lastUpdatedDate = taskObj.ActivityDate;          // update Opportunity 's custom field Update_Due_Date_of_Task__c         opportunity[] optyObj = [select Id,Update_

URL hacking to auto populate fields on click of button

Hi Developers !!. This post is regarding the   Custom Button   on  Opportunity  Object which  will help us to create cloned opportunities and auto populate fields with its Line items with the help of URL hacking  Please follow the below steps: 1. Go to setup. 2. Create new detail page button on Opportunity object. 3. Give the Label for button. 4. Set behavior as  'Execute JavaScript'  and Content Source as  'OnClick JavaScript' . Paste the below snippet of code in your window. {!REQUIRESCRIPT("/soap/ajax/29.0/connection.js")}  {!REQUIRESCRIPT("/soap/ajax/29.0/apex.js")}  var  urlhack = "{!URLFOR( $Action.Opportunity.Clone , Opportunity.Id, [cloneli=1,opp11='Unqualified',CFID (Give id of the custom field)=Opportunity.Name])}";  window.open( urlhack ); 5. Go to opportunity layout and add new button in the layout.